|
Activities, teaching subjects, ways of approaching the subjects both from the trainer and the trainees.
The first aim was to get the trainees in touch with the history of the area, to acquire a better knowledge of the ceramic art from the Neolithic Age till the Classical Times. This was achieved by the visit to the archaeological museum of Pella under the guidance of the archaeologist Ms Triandafyllidou on the 29th of January.
The trainees received a questionnaire by their trainer Ms Aggeliki Papadopoulou and exercised themselves through this in noticing details, shapes and decoration of the clay exhibits.
The trainees showed a great interest, asking questions all the time and writing down information that they could later transfer to the lab and utilize correspondingly.
These questions defined the way with which we approached the first year of our partnership, that is ceramics of our area in antiquity. Is the reproduction of copies of ancient pots or sculpture enough so as to ‘learn’? Or it might be really interesting to try to conceive and deepen to the worth that ruled that creative thought which used to make and decorate such forms?
In other words,
- How can we utilize all this potential of thinking, inventiveness and elegance for the production of art pieces by trainees that get in touch with ceramics for the first time or by those that have greater experience in that?
- How can we use the raw materials from the area getting to know them better? How can we combine them with materials from other districts in a clever way? How can we conceive the sense of economics in the means of ancient people but also their attempt to achieve the maximum in use and aesthetics as well?
- Could we as separate persons and/or as groups approach the substance of the material and beauty?
Units worked in the lab:
1. Making pots with a string.
We chose forms and decorative ways from the Neolithic Age because it is the start of clay’s history, without lathe but also because they are the simplest. We used red clay of low fire and curved decoration with geometrical patterns which we filled with white clay. This exercise aimed in learning how to shape a mass and the attempt to decorate masses successfully.
2. Making tiles with plates of clay
We made ceramic tiles to use them as a surface upon which the trainees transferred decorative themes of vessels of the Neolithic period. They also familiarize themselves with decoration techniques, curving and painting with local colours as paint brushes for engobio. These are baked in high temperature in order to achieve a glaze effect with a specific aesthetic result.
This way the trainees also began to pay attention and choose a part of a whole pattern which they can reproduce on other kinds of surface.
3. Making ceramic boxes.
This theme was chosen because the trainees could use the children’s toys they saw in the museum as an inspiration and decorate the lid of the boxes. They should find the mass analogies and the colouring of the vessels and dare to try different solutions changing the lids of the toys and the decoration.
Some trainees worked upon two – coloured, some added a funny element in the pattern and described a story of a little animal on the surface of the objects. They had fun and took a first taste of the plurality of thinking when creating.
4. Seminar of clay and lathe by Mr Staggides Ioannis, a ceramist invited by our lab (23-02-2011).
Mr Staggides Ioannis is one of the best contemporary Greek ceramists and of the few left that makes earthenware jars of large dimensions.
He has made a lot of research on the ground and soil needed to have suitable clay for the production of the jars. He has also dealt with the construction of ceramic furnaces and has got a great teaching experience. This seminar included the following:
- Introduction to the raw materials of the broader area suitable to make flexible clay.
- Introduction and practice on work(kneading)and its importance for the clay.
- Teaching and practise on construction of cylindrical forms, bowls, curved vases by the lathe.
5. Making objects with moulds of faces and human figures.
One of the characteristic in the museum of Pella were plenty moulds of human figures. This gave the trainees the chance to learn how to make a mould using plaster and then to press clay on it. This workshop is still taking place.
Giannitsa
The trainer of the ceramic department
Aggeliki Papadopoulou
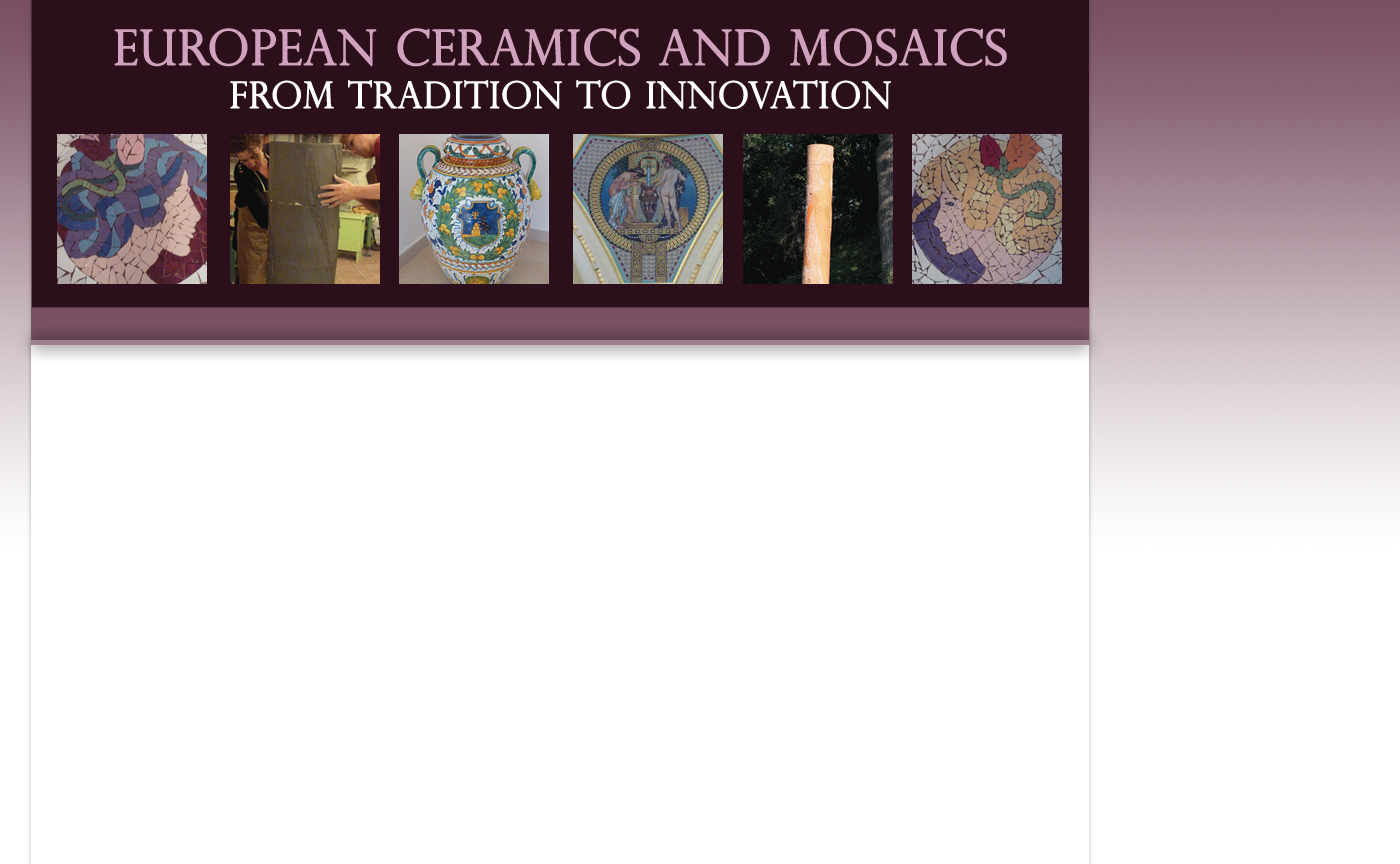
MOSAICS LAB: The work of the first year of our partnership
Description of our work/techniques
Covering the first year of our partnership, we worked with pebbles inspired by the nearby museum of Pella which we visited and by the wider history of our area in the Byzantine Art.
Instant placement :
Ancient tradition is based in mosaics made by pebbles.
We started making tests on how to place directly. You can see in our photos, the material (called "Heraklit") on which we place first the cement mixture and then the pebbles. "Heraklit" is made from sawdust and glue and it's very light.We used the traditional cement mixture: sand, lime, dust from bricks.
Indirect placement :
The pebbles are stuck on the fabric with (flour) starch and when the art piece finishes we add the cement mixture.What we see then is the untoward (back) side of the final piece.
Metal lead plies in between and pieces of baked clay are used by us (used at ancient times as well) to form the details.
We take the pebbles from nearby beaches and rivers.We place the whole pebble as it is but its straight side on the fabric.
Art pieces with marbles:
For Byzantine art pieces we use marbles, glass or ceramic tiles, bricks or the back side of the ceramic tiles we put on floors or kitchens.
We cut the materials with the tool of cutting and then with the pricers.A little primitive but effective way!
Procedure of making a byzantine copy:
1) We take a photo of the original
2) We place a transparent piece of paper on the photo and then design on this paper every inlay according to the original.
3) We copy the drawing on a piece of fabric and we start the placement.
We exhibit our art pieces at the beginning of June every year.
|